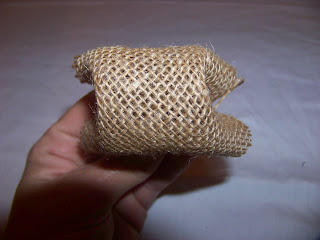
There are so many fun ways to create a burlap wreath. This is another one that we absolutely love and had a great time creating. While we know you have wonderful ideas of your own, we are having a lot of fun sharing our creations with you. We hope they are getting your creative juices flowing and you are inspired to do your own. We are also enjoying your feedback! Please keep the emails coming! Today's FREE DIY Burlap Project is a "Bubble" Wreath and we love it! Again, this is another really simple project. So, lets get started.
Materials Needed:
- Burlap (yardage depends on size of wreath)
- Urethane Wreath Form
(we used a 20" Form. A 16"-18" form would work great)
- Floral Pins (U-Pins)
- Ribbon/Bow (if desired)
First, you need to cut 4X4 burlap squares. If you would like the "bubbles" to be larger, you can cut the squares a bit larger. The squares do not have to be perfect by any means. To cover our 20" wreath, we used about 140 squares, but we spaced them tightly and we were working with a large form. In our case, we are using burlap that is 48" wide. So, we cut twelve 4" X 48" strips and then cut them into 4" squares. We stacked the strips and cut several at a time.
(It sounds like a lot, but cutting them doesn't take long at all).
Next, we began the process of creating the "bubbles" out of the burlap squares and pinning them to the wreath form. To creat the bubbles, (1) fold the square to creat a triangle, (2) fold the top right triangle point down to join the bottom point, (3) fold the top left point down to join the bottom points. (4) Now, you should have all points secured with your fingers. (5) Using a floral pin, pierce through all four points to hold the bubble.
(1)
(2)
(3)
(4)
(5)
Now, begin adding the burlap "bubbles" to the form by inserting the pin into the form.
The goal is to create good coverage on the form and conceal the pins as you go. The spacing can be "loose" as long as the coverage is good and none of the form is visible. We chose to tightly space ours to create a fuller look, but both methods look great.
Continue the process filling in gaps as needed until the form is fully covered and not visible from the front view.
Once you are satisfied with your wreath"s appearance, add a bow or other embellishment of your choice for an added touch.
Enjoy!
Project Notes:
- Do not be concerned with fraying of the burlap squares as it adds to the overall
look.
- As stated, above if you prefer a fuller, looser look, cut larger squares and
space them out a bit more.
- If you have burlap "bubble" pieces that seem to not be attached well, simply
add additional floral pins to secure them, making sure to conceal the pins.
- Make sure to cover both the inside and outside edges of the form so that
they are not exposed.
Don't forget to stop by Details to pick up your burlap and get started!


No comments:
Post a Comment