


Materials List:
- Burlap (yardage depends on the size of your placemats and the quantityyou choose to make)
- Grosgrain Ribbon 7/8" width (again yardage depends on size and quantity of
placemats)
- Stitch Witchery (or Hot Glue Gun)
- Jute String
You can make your placemat any size that you choose or that will work best on your table. For our sample, we made ours 14" X 19". Simply determine the size that will work best for you and then cut-out the quantity that you need.
First, we cut our burlap 14" X 19".

Next, we attached our grosgrain ribbon using stitch witchery (a hot glue gun can also be used). We chose to use a chocolate brown ribbon for our sample.

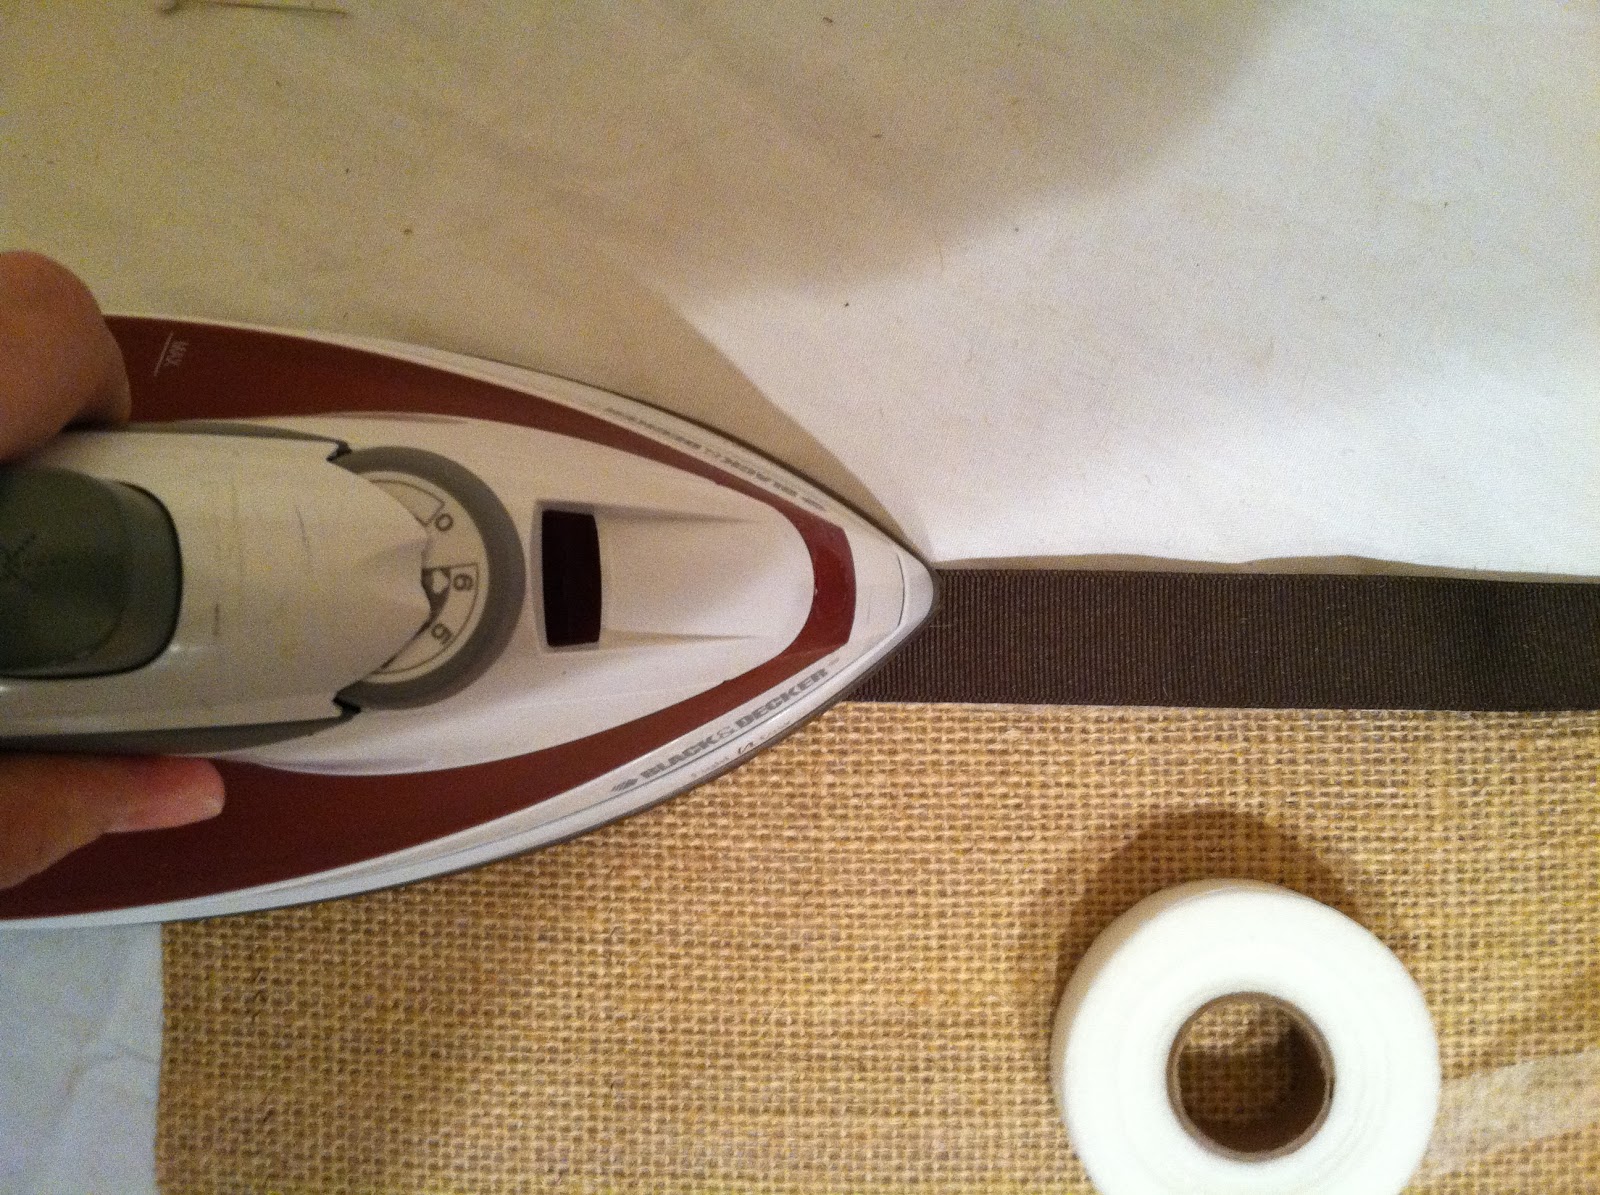
Iron or hot glue the ribbon to the edges of the burlap on all four sides. Initially let the top piece of ribbon extend over the edge. Then, cut it at an angle to create a mittered appearance and glue or iron it down.


Now that all 4 sides are banded with the ribbon, you are ready to add your embellishment. On each corner, put a dot of glue about the size of a quarter. Place the starting end of the jute string in the center of the glue to hold it (be careful not to burn yourself). Then, you just wind the string around creating a circle. Add a very small dot of glue if needed to hold the finishing end of the jute string.


Repeat on all 4 corners. Now you have a finished product. Repeat the process to create as many placemats as you need.

Notes:
- We used approximately 2 yards of ribbon per 14" X 19" placemat.
- Any color of ribbon can be used to suit the season, occasion, or your decor.
- Other embellishments can be used in the corners such as buttons, appliques,
etc...
- We also think it would look great to stencil an initial or design in the center of
the placemat.
- If you made the table runner from yesterday's burlap project, you can use the
burlap left over (on the other side) for your placements.
Enjoy!!!
Don't forget to stop by Details to pick up the burlap you need to complete your projects.
***Remember to watch for the next burlap project. We have some really great ones coming up!
No comments:
Post a Comment